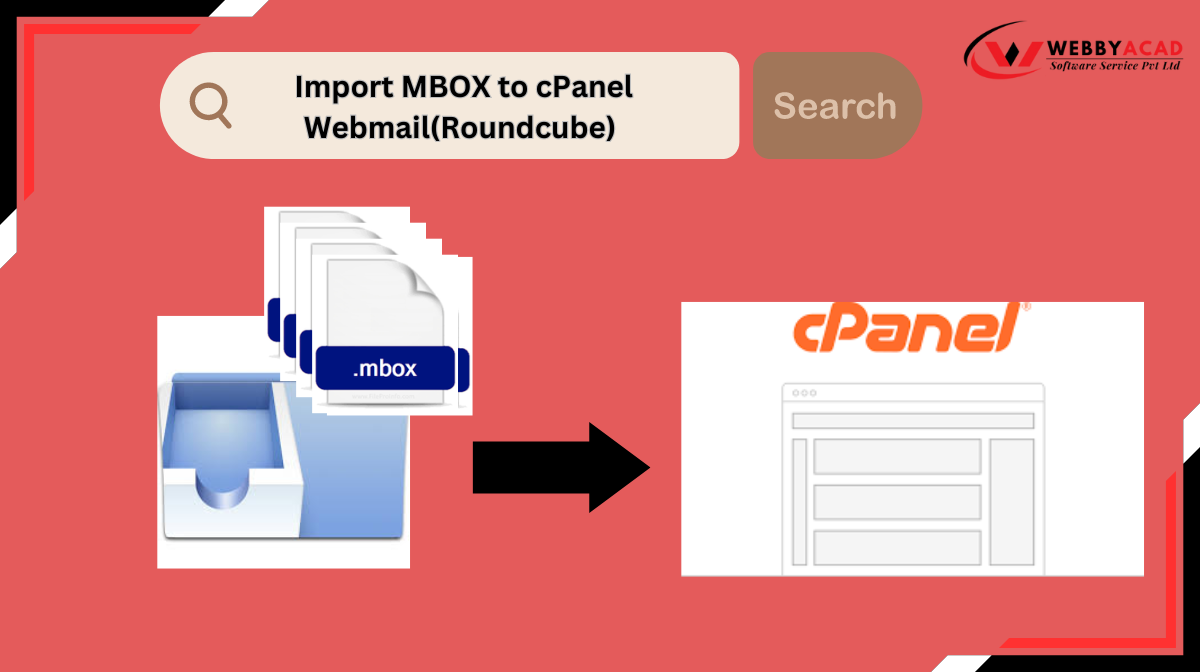
To import MBOX to cPanel webmail (Roundcube) in 2026:
- Login: Access your cPanel account and open Roundcube Webmail.
- Select Folder: Click on the folder (e.g., Inbox) where you want the emails.
- Import Menu: Click the Gear icon (More) or the three dots in the corner and select Import.
- Upload: Browse and select your MBOX file.
- Sync: Wait for the upload to finish; your emails will appear instantly.
Note: For large files (over 50MB), use an MBOX Converter tool to migrate via IMAP.
In the evolving landscape of digital communication, MBOX remains one of the most common file formats for storing email archives. Whether you are moving from Mozilla Thunderbird, Apple Mail, or a backup file, the need to import MBOX to cPanel arises frequently when users transition to a new web hosting environment.
Accessing your historical emails directly through cPanel’s Roundcube interface allows for better mobility and centralized management. In this guide, we provide a refreshed look at how to upload MBOX to cPanel efficiently in 2026.
Why Migrate MBOX to cPanel Webmail?
Moving your local archives to the cloud (cPanel) offers several professional advantages:
- Universal Access: View your MBOX emails from any device using Roundcube.
- Server-Side Security: Benefit from the robust encryption and anti-spam filters provided by cPanel.
- Centralized Backups: Once your MBOX files are on the server, they are included in your regular cPanel account backups.
Method 1: The Manual Import (Best for Small Files)
Most modern cPanel installations use the Roundcube webmail client, which has a built-in import feature. This is the most direct way to import MBOX to Roundcube.
Step-by-Step Instructions:
- Access Webmail: Log into your cPanel account, navigate to “Email Accounts,” and click “Check Email” for the desired address.
- Open Roundcube: Once inside the Roundcube interface, select the folder where you want to import the data.
- Initiate Import: Look for the three dots (More) or the gear icon in the top right or bottom left corner of the interface. Click Import.
- Select MBOX File: A popup will appear. Browse your local computer for the MBOX file you wish to upload.
- Complete Upload: Click Import. Roundcube will process the file. Once finished, a notification will appear, and your emails will be visible.
Method 2: Importing via Thunderbird (The IMAP Sync Method)
If you already have Thunderbird installed, you can use it as a “bridge” to import MBOX to cPanel webmail.
Configure Account: Add your cPanel email account to Thunderbird using IMAP settings.
Add MBOX to Thunderbird: Use the “ImportExportTools NG” add-on to load your MBOX file into Thunderbird’s “Local Folders.”
Drag and Drop: Simply select the emails from the Local Folder and drag them into the cPanel IMAP folder.
Syncing: Thunderbird will upload these emails to the cPanel server automatically.
- cPanel is made in such a way that it has a friendly graphical user interface, like in website management; managing emails.
- It is very straightforward to operate and allows the users to reach and utilize their functions very conveniently.
- Webmail on cPanel allows you to log into your e-mail account anywhere, at any time, and on any device.
- Importing MBOX to Roundcube Webmail ensures your data stays secure, as cPanel provides robust protection with authentication and encryption.
- cPanel is compatible on browsers like Google Chrome, Safari, Opera, Firefox, and Internet Explorer.
Method 3: The Professional Solution (Best for Large Scale Migrations)
For businesses or users dealing with large archives, manual methods can be slow and prone to data loss (such as missing attachments or broken headers).
To ensure 100% data integrity, using a professional MBOX Converter is the recommended path. These tools bypass webmail upload limits by connecting directly to the cPanel server via IMAP protocols.
How to Import MBOX to cPanel Webmail Automatically:
Here are the easy steps to help you understand how the tool works, follow them closely.
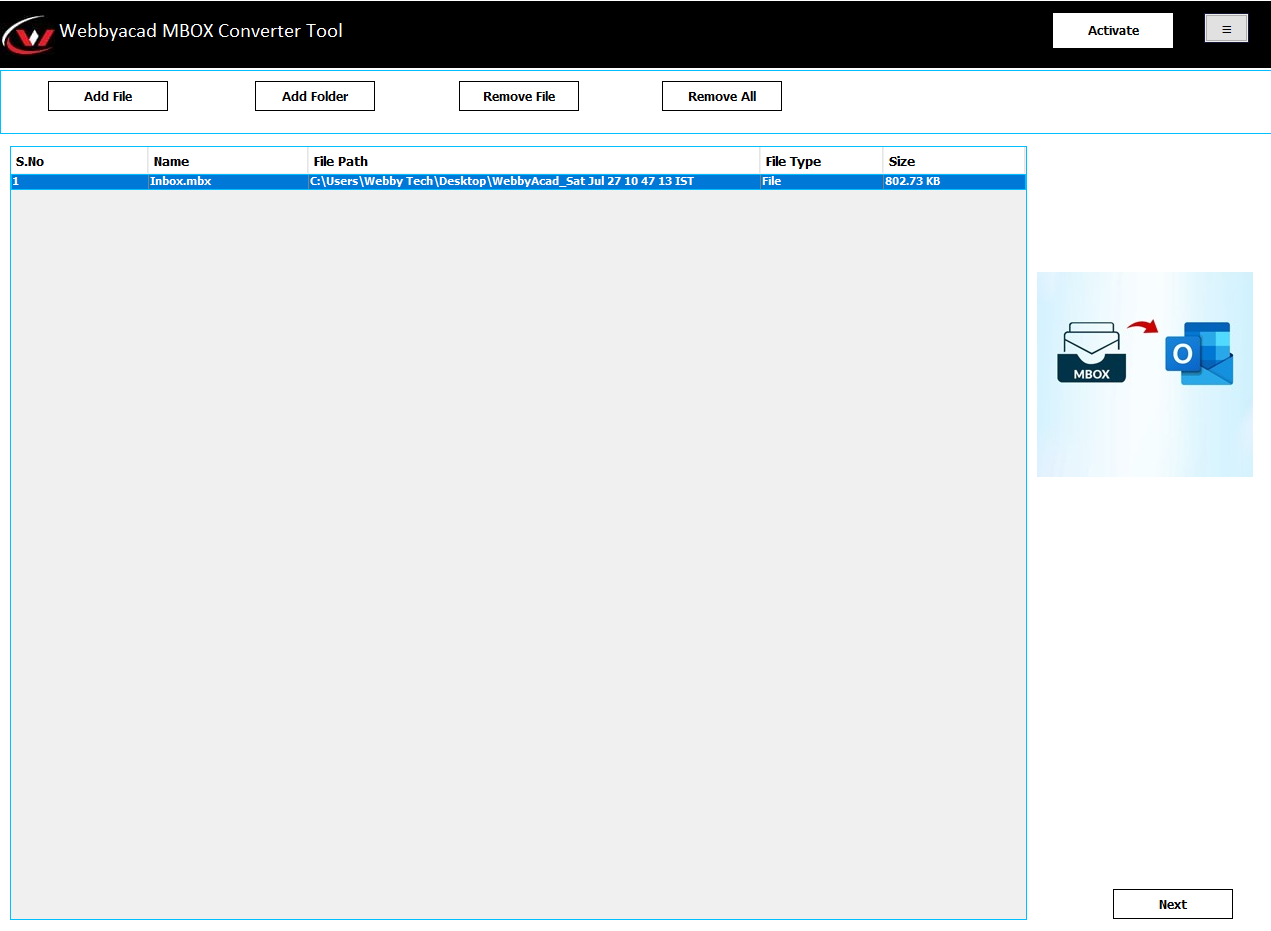
- First, download an MBOX converter tool and install it on your computer system.
- Click “Select File” to look at a single or multiple MBOX files.
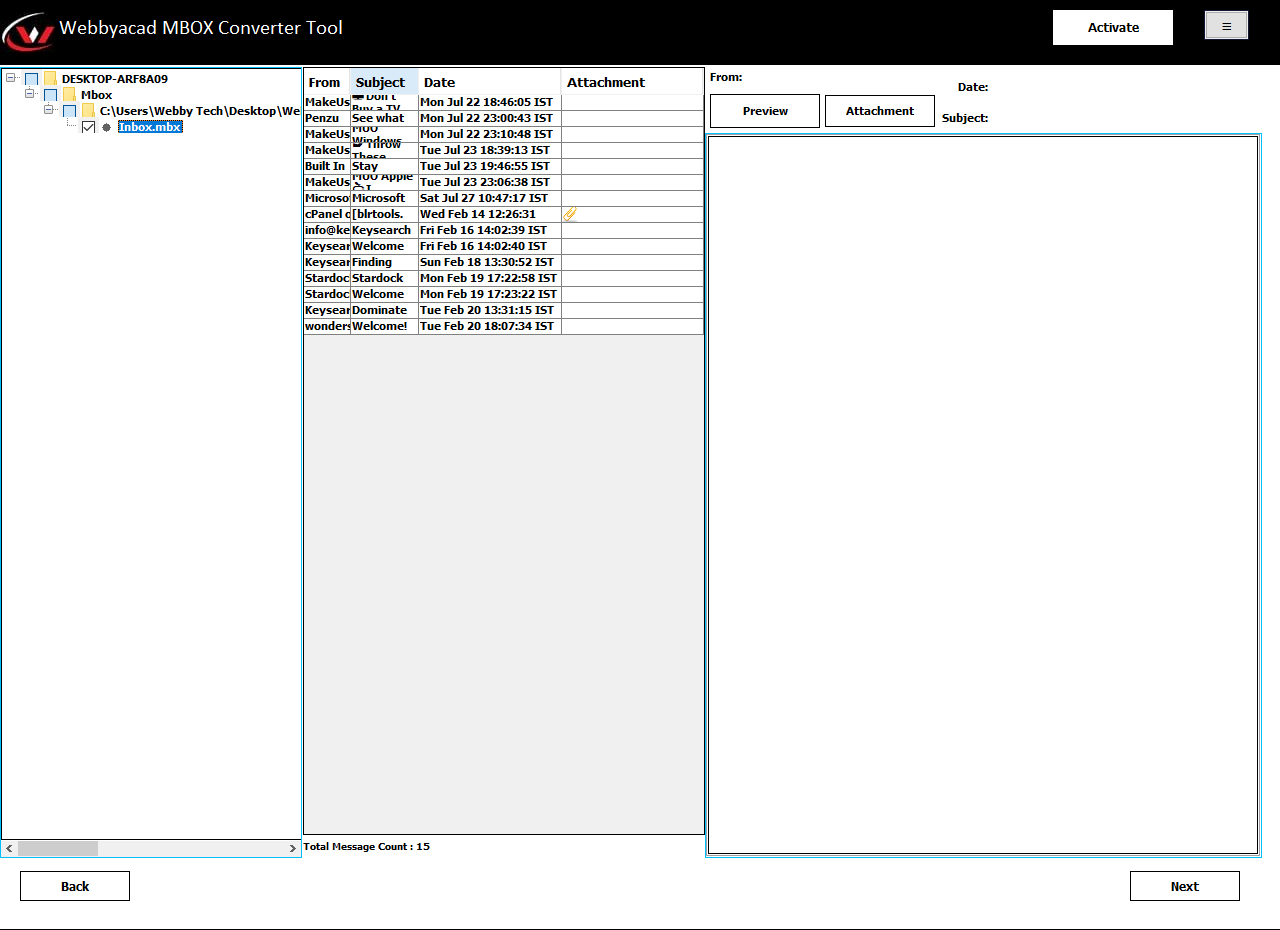
- After that, select the mailbox folders to view the necessary information, choose next.
- Here, in the saving format, choose IMAP-Email Client from the drop-down menu. Choose the additional features of the software according to your requirements, then assign a desired saving destination for the resultant file.
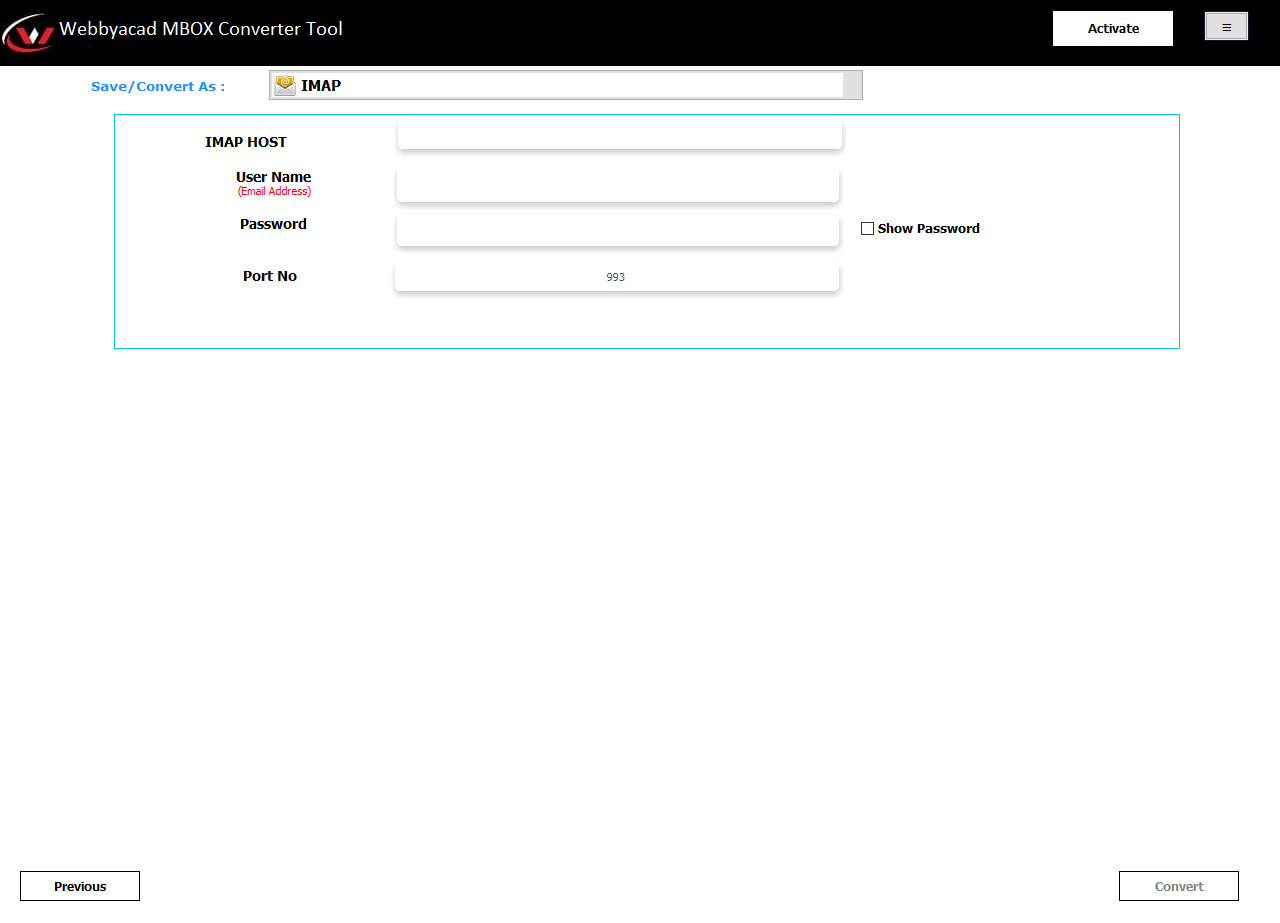
- Now, enter your cPanel webmail login information.
- Lastly, click Convert to initiate the MBOX conversion process to get imported to your cPanel webmail.
Advantages of Professional Tools:
- No File Size Limits: Easily migrate MBOX files over 2GB.
- Folder Hierarchy: Maintains the original structure of your subfolders.
- Batch Processing: Import multiple MBOX files to different cPanel accounts simultaneously.
Common Issues During MBOX to cPanel Import
While the process is generally smooth, you may encounter these common hurdles:
- Timeout Errors: Large MBOX files can cause the browser to timeout.
- Unsupported Formats: Ensure your file is a standard MBOX (not a corrupted .mbox.msf index file).
- Disk Quota: Verify that your cPanel email account has enough storage space to accommodate the new data.
Conclusion:
To import MBOX to cPanel webmail is quite an easy process if the steps are properly followed. In our blog, we provided detailed information on how one can easily import MBOX files to cPanel. One can select any of the methods available, but it would be necessary to choose an appropriate one. However, choosing the correct method will enable the accurate application of the solution. Be it to import MBOX files manually or prefer the ease of a professional tool, the MBOX email changer saves your precious time by making this import process easy and ensuring data integrity.